Generating a Topographical Map
Mon, Oct 8, 2018Today we are going to generate a topographical map from hundreds of 2D images captured by my brother’s drone. He took the photos about a week ago and imported them into a software called DroneDeploy. This software will stitch them together using a technique called Stereophotogrammetry.
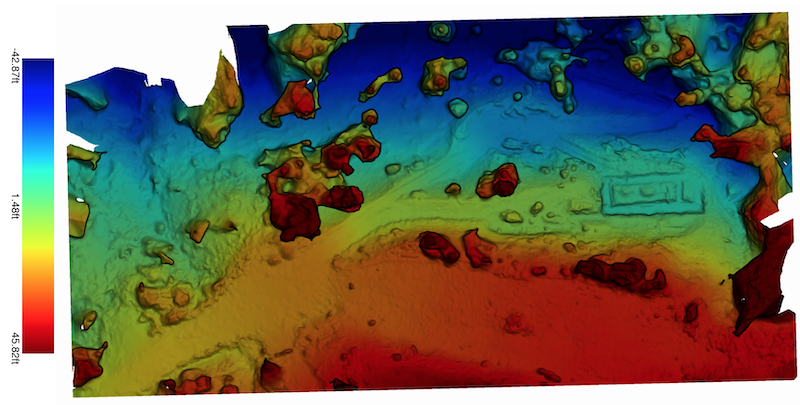
This is roughly what we get from DroneDeploy.
DroneDeploy will export an OBJ file. SketchUp cannot read this directly (at least my 2018 PRO version cannot), so we used MeshLab to convert it to a DAE file. This is a file type that SketchUp can import.
Be careful because SketchUp has a hard time opening extremely complex geometries. These 3D models are pretty intricate and dense, so I spent some time in MeshLab cleaning up the model first. I removed terrain that was not near our build site, and removed shapes that were obviously trees or bushes.
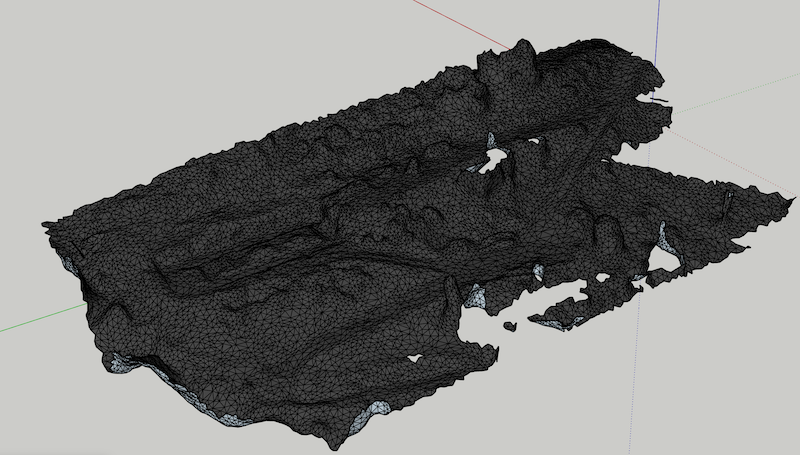
Even with the cleaned up model, it took a minute to import into SketchUp. I placed the terrain on one layer, and immediately hid it.
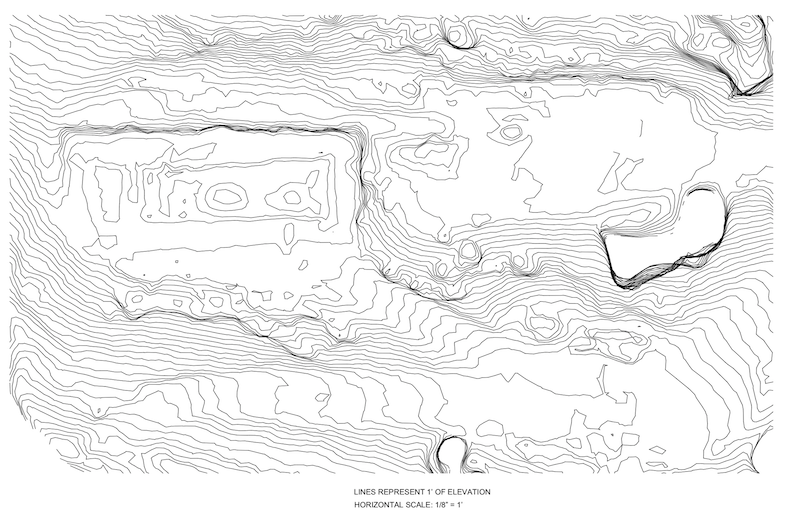
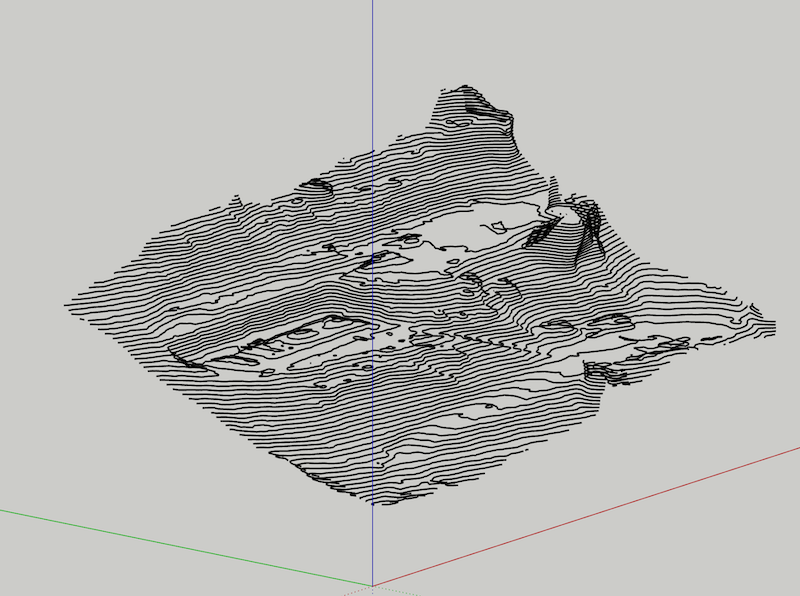
In order to create the contour lines, I had to create a series of rectangles. The rectangles needed to cover the terrain I was interested in mapping (on the X and Y plane), and then copies of this rectangle stacked in 1’ increments on the Z axis. So I had a stack of rectangles, each 1’ apart, and this collection occupied the same space as the terrain.
The rectangles will become our contour lines. If you wanted your contour lines to represent 6” of elevation, you would space them at 6” instead of 1’.
To make the contour lines, we will use the intersection tool in SketchUp to draw a line at the intersection between the rectangles and our terrain. These intersections will form our contour lines!
Voila!
Now I defined a Scene with the camera oriented from the top and without the perspective view on. I imported this scene to Layout and added some annotations to define orientation and our scale. Looks pretty professional!